You might have heard of the next-level virtual assistant incorporated in the new Samsung Galaxy S8 if you are one of the tech maniacs. The virtual assistant – Bixby is like the other AI-assistants including Apple’s Siri, Google Now, but it can do more than them. With that assistant, you can talk, interact, schedule and use other features of the phone like image recognition, location awareness, and many others.

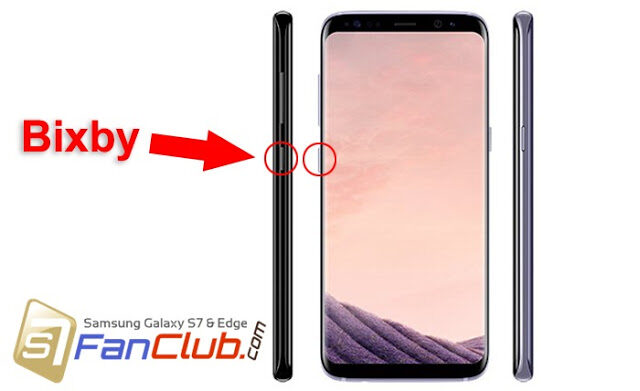
You can get benefited from this incredible feature of the Samsung Galaxy S8 with the help of a dedicated button on the left side of the phone. Although Bixby is one of the biggest highlights of the new flagship of the South Korean Giant, but it is still in its infancy. Samsung understands that too and it turns out that you can customize the Bixby’s dedicated button according to your own choice. Well, that’s a great option for the ones who don’t want to use Bixby often.

This was not known until Marques Brownlee tweeted about remapping the Bixby button. The challenge created a spark all over the social media, yet the phone is still to come in the hands of the consumers. So, if you are the one who wants to get some $$$, here’s the steps to follow to remap your Galaxy S8’s Bixby button to launch any application you want.
How to Remap the Galaxy S8’s Bixby Button to Launch Any Application?
There are online tutorials available showing the steps to remap the Bixby button. According to one tutorial, the easy thing to do is to get an application called bxActions from the Google Store, that can make the users perform multiple functions. Like single tapping would help to open a specific app, the double tap would perform different thing or even long tapping the Bixby button will do something different and so on.
You can download this application from the Google Play and follow the per instructions in order to customize your Bixby button. Not only this, you can use Bixby Button to launch the Google Assistant as well, the long way. Here’s what you can do to launch Google Assistant:
How to Remap Bixby Button to Launch Google Assistant?
In order to launch the Google assistant, all you need to have an application called “All in one Gestures” from the Play Store. After getting this application on your Galaxy S8, follow the following steps:
- Installing the All in one Gestures app would ask the permission to grant the access to modify your system settings. So you need to grant it access as you want to remap your Bixby button to customize it.
- After this, open the application and swipe left to the tab, that says “Hard Keys”.
- Switch it on to Enable the hard keys.
- Enabling hard keys will prompt you to show up on the bottom of your screen, asking to enable “All in one Gestures’ Accessibility Service”.
- Tap on the button that will direct you to the “Accessibility” screen.
- Navigate the screen until you find “All in one Gestures” under the services section.
- Tap the “All in one Gestures” button and press OFF radio button to toggle it ON.
- After this, return to the “All in one Gestures” tab again.
- Reaching there, you will find “Custom Keys” button in the overflow/menu button.
- Tap the custom keys button and tap on the Bixby Button.
- Alongside pressing the Bixby, press the back button to again reaching the “All in One Gestures” tab.
- After reaching the home tab again, you would see a key code with the number
- Press Add and by pressing this, you will see the key Code number 1082 under the Custom Keys section in the home tab saying “All in One Gestures”.
- This will bring up another dialog box showing a screen with “Action” written on it. Tap “Search” in this list and select “Voice Search” from the pop-up
- Once that’s done, you would see “Voice Search” under the Key Code 1082.
That’s all. Now, when you press your Bixby button, it would launch Google Assistant!
Although with latest OTA software update, Samsung has decided to disable the remapping of dedicated bixby button on Galaxy S8 / Galaxy S8 Plus.
- Top 10 Best Samsung Galaxy S23 Camera Apps - September 5, 2023
- Download 4D Parallax Wallpapers App Galaxy 24 Ultra - September 5, 2023
- How to Delete or Deactivate Instagram Account Permanently? - September 5, 2023
